Create your own copy of the final zine!
Publishing is the fourth and final stage of the Zineography process. Thank you to all who contributed towards the Zineography (PDC 2022) Zine!
Download and print your copy of the final zine here! The full zine can also be viewed at the bottom of this page.
Printing & Binding
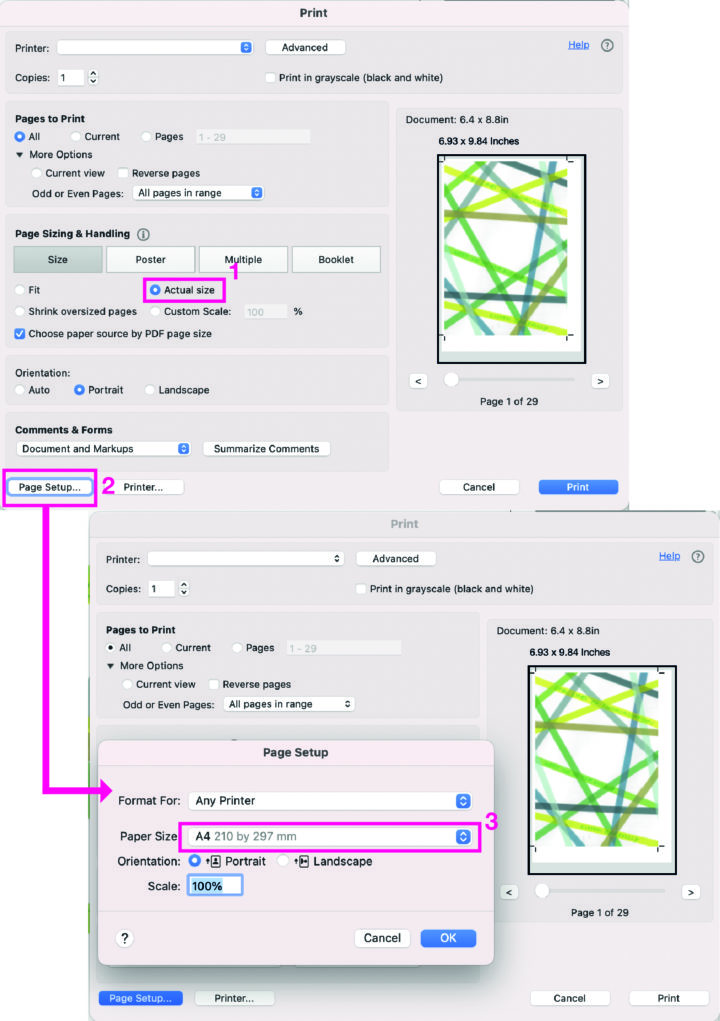
- Download the zine file from the link above – this file includes crop marks (little lines near the corners of the page), to note where the sides of each page should be cut. The image below details this process [please note: exact steps may differ based on your printer/computer or device]:
- Select ‘actual size’ when printing, to ensure the pages will print in A5 size
- Select ‘printer setup’
- Select your paper size. The zine pages are A5 size (148 x 210mm) so make sure you select a paper size larger than this to print on (e.g., letter or A4)
- Then print (single sided)
- Cut out the zine pages* using your preferred method (e.g., scissors), using the crop marks as a guide for where to cut. If cutting out by hand, it may be useful to use a ruler to draw straight lines between the crop marks, so you can cut along the marked line
- The final zine should ideally be bound using spiral binding*, to allow the reader to rearrange pages at their discretion. This can be done at home (a few materials needed: a ruler, a hole punch, appropriate wire, a wire cutter, and a pen/pencil) or by taking your pages to a print shop. To allow the viewer to change the pages: leave 1-4cm of extra coil binding at the top and bottom of your zine, and do not tuck the ends of the coiled spiral in to ‘lock in’ the pages.
*If you do not wish to bind the final zine using a spiral binding: consider leaving 1cm of white space along the top of the printed pages to create a ‘spine’, or folding area. Fold the pages along this top line, and use a stapler to staple the pages together within this top white space.